Posts

My new book is now available from Amazon.

From the cover:

The Essentials of Data Science: Knowledge Discovery Using R presents the concepts of data science through a hands-on approach using free and open source software. It systematically drives an accessible journey through data analysis and machine learning to discover and share knowledge from data.

Building on over thirty years’ experience in teaching and practising data science, the author encourages a programming-by-example approach to ensure students and practitioners attune to the practise of data science while building their data skills. Proven frameworks are provided as reusable templates. Real world case studies then provide insight for the data scientist to swiftly adapt the templates to new tasks and datasets.

The book begins by introducing data science. It then reviews R’s capabilities for analysing data by writing computer programs. These programs are developed and explained step by step. From analysing and visualising data, the framework moves on to tried and tested machine learning techniques for predictive modelling and knowledge discovery. Literate programming and a consistent style are a focus throughout the book.

Data scientists rely on the freedom to innovate that is afforded by open source software. We often deploy an open source software stack based on Ubuntu GNU/Linux and the R Statistical Software. This provides a powerful environment for the management, wrangling, analysis, modeling, and presentation of data within a tool that supports machine learning and artificial intelligence, including deep neural networks in R.

Whilst the open source software stack is also usually free of licensing fees we do still need to buy hardware on which to carry out our data science activities. Our own desktop and laptop computers will often suffice but as more data becomes available and our algorithms become more complex, having access to a Data Science Super Computer could be handy. The cloud offers cheap access to compute when you need it and the Azure Ubuntu Data Science Virtual Machine (DSVM) has become a great platform for my data science when I need it. The Ubuntu DSVM comes pre-installed with an extensive suite of all of the open source software that I need as a data scientist (including Rattle and RStudio).

A new data science virtual machine can be deployed with with a few clicks and some minimal information in less than 5 minutes. As our data and compute needs grow it can be resized to suit. Paying for just the compute as required (e.g., at 25 cents per hour) is an attractive proposition and powering down the server when not in use saves me considerably compared to having a departmental server running full time, irrespective of its workload. When not required we can deallocate the server to cost us nothing.  There is no need for expensive high-specification hardware sitting on-premise waiting for the high demand loads when they are needed. Simply allocate and resize the virtual machine as and when needed and pay for the hardware you need when you need, not just in case you need it.

The version of R provided with the Linux Data Science Virtual Machine is Microsoft’s R Server (closed source). This is based on the open source version of R but with added support for beyond RAM datasets of any size with parallel implementations of many of the machine learning algorithms for the data scientist. In the instructions below though please note that we replace Microsoft R Server as the default R with open source R. Both are then concurrently available on the server.

I begin with a link to obtaining a free trial subscription (if you don’t already have an Azure subscription) and then continue to set up the Ubuntu DSVM using the Azure Portal and configuring the new server with various extra Linux packages (that are not yet on the DSVM by default – but stay tuned) as well as an updated version of open source R and Rattle. Note that the deployment and setup of the DSVM can also be completed from R running on our own laptops or desktops using our new AzureDSVM R package. This then allows the process to be programmed.

The following looks like a lot of steps, and maybe so, but each is simple and the whole process is really straight forward. If you disagree, please let me know and we’ll work on it.

Obtain an Azure subscription

  1. A free trial subscription is available from azure.com. This is useful to get a feel for the capabilities of the Azure cloud and the costs involved. Costs apply only for the time the DSVM is deployed (irrespective of how much the CPU is utilised when it is deployed) so it is good practise to stop the server if you don’t need it for a period of time.

Create a Linux Data Science Virtual Machine

  1. Log on to the Azure Portal.
  2. Click on + New.
  3. Search the Marketplace for Linux Data Science Virtual Machine.
  4. Select the Data Science Virtual Machine for Linux (Ubuntu) from the search results.
  5. Read the description to see if it matches your requirements and then click on Create.
  6. Setup the Basics
    • Name the machine. E.g., dsvmxyz01.
    • Keep SSD as the VM disk type.
    • Provide a Username and Password. E.g., xyz and h%nHs72Gs#jK. (Using an SSH public key is preferred but beyond the scope of this introduction and can be set up later.)
    • Choose your Subscription.
    • Create a new Resource group and give it a name. E.g., dsvm_xyz_sea_res. A resource group is a logical collection of resources.
    • Choose a Location. E.g., Southeast Asia.
    • Click on OK. Your selections will be validated.
  7. Choose a server Size.
    • Choose a VM size. The configuration and monthly cost will be displayed for each. I generally start with the cheapest and rescale later as needed. Note that  $100 for a month is, very roughly, 15c per hour whilst it is Running and no charge whilst it is Stopped. You can later resize the server if you need a bigger one to get things done more quickly.
    • Click View all to see all server options.
    • Once you have decided then click on Select.
  8. In Settings
    • Check the default information and generally we go with the defaults unless we know otherwise.
    • Click on OK.
  9. In Purchase
    • Check the Offer Details, the Summary and the Terms of use.
    • If all is okay then click on Purchase.
  10. Wait while Deploying Linux Data Science Virtual Machine
    • This takes about 5 minutes.
    • The new VM appears in the default Dashboard.
  11. Set up a DNS name label (should be done during set up – how?)
    • Click the Public IP address
    • Click Configuration
    • Provide a DNS name label. E.g., dsvmxyz01.
    • Click on the Save icon at the top of the tile.
    • We can now refer to the server as dsvmxyz01.southeastasia.cloudapp.azure.com

Connect using X2Go on your local desktop (Linux or Windows)

  1. X2Go provides access to the remote desktop for the DSVM. See http://wiki.x2go.org for details.
    • For Windows local computer: download and run the X2Go client for windows.
    • For Ubuntu local computer using wajig:
      $ wajig install x2goclient
    • If it is not available then install it directly from X2Go
      $ wajig addrepo ppa:x2go/stable
      $ wajig update
      $ wajig install x2goclient
  2. Start-up X2Go and create a new Session (top left icon)
    • Session Name: dsvmxyz01
    • Host: dsvmxyz01.southeastasia.cloudapp.azure.com
    • Login: xyz
    • Session Type: XFCE
    • Click on OK
  3. Click on the new session as appears in the right hand column.
  4. Provide the password: h%nHs72Gs#jK
  5. Click on OK
  6. Click Yes on the Host key verification failed popup to accept the new server’s host key since this is the first time we have seen this new server.
  7. A desktop running on the remote virtual server will appear within a window on your local computer’s desktop.
  8. You can open up a Terminal Emulator from the bottom dock so as to continue on to tuning the server.
  9. An alternative is to simply connect to the new server using ssh (on GNU/Linux) or putty (on MS/Windows)
    $ ssh xyz@dsvmxyz01.southeastasia.cloudapp.azure.com
    Warning: Permanently added the ED25519 host key ...
    xyz@dsvmxyz01...'s password:
    Welcome to Ubuntu 16.04.2 LTS (GNU/Linux 4.4...)
    
    * Documentation: https://help.ubuntu.com
    * Management: https://landscape.canonical.com
    * Support: https://ubuntu.com/advantage
    
    Get cloud support with Ubuntu Advantage Cloud Guest:
    http://www.ubuntu.com/business/services/cloud
    
    178 packages can be updated.
    1 update is a security update.
    ...
    $

Run RStudio Server on the DSVM

  1. The RStudio Server (and Desktop) is pre-installed on the Ubuntu DSVM but can be updated. Open up a Terminal Server (or ssh/putty connection) on the DSVM
    $ wget https://download2.rstudio.org/rstudio-server-1.0.153-amd64.deb
    $ wajig install rstudio-server-1.0.153-amd64.deb
    $ wget https://download1.rstudio.org/rstudio-xenial-1.0.153-amd64.deb
    $ wajig install rstudio-xenial-1.0.153-amd64.deb

    You may need to start the server: $ sudo rstudio-server start

  2. You will be asked for the user’s password in order to authorise the running of the RStudio server.
  3. Connect to http://dsvmxyz01.southeastasia.cloudapp.azure.com:8787  You will be warned that the connection is not secure. You should see the RStudion login page and if you are comfortable with the scurity warning then continue to provide your username and password. Note that encrypted RSA is used in transmitting the credentials so I believe it should be secure.
    Username: xyz
    Password: h%nHs72Gs#jK
    

Install support packages and latest R

  1. Connect to the DSVM through X2Go for a desktop experience and open up a Terminal Emulator.
  2. Update the operating system, install some utilities, and then reboot the server (note that you do not have to accept the EULA for the msodbcsql package as it is not required for the open source stack and can be removed):
    $ sudo apt-get install wajig
    $ wajig remove msodbcsql
    $ wajig update
    $ wajig distupgrade
    $ wajig install htop libcanberra-gtk-module
    $ sudo locale-gen "en_AU.UTF-8"
    $ sudo reboot
    
  3. Re-connect to the DSVM through X2Go to install and test the latest R
    $ wajig addrepo ppa:marutter/rrutter
    $ wajig addrepo ppa:marutter/c2d4u
    $ wajig update
    $ wajig distupgrade
    $ wajig install r-recommended r-cran-rattle r-cran-tidyverse
    $ wajig install r-cran-xml r-cran-cairodevice r-cran-rpart.plot
    $ sudo Rscript -e 'install.packages("rattle", repos="http://rattle.togaware.com")'
    
  4. Test out the R installation:
    $ R
    > library(rattle)
    > rattle()
    Click: Execute; Yes; Model tab; Execute; Draw; Close; Yes
    

Desktop R Studio

RStudio can be used through the browser from your local machine as we saw above, or else on the remote server’s desktop. For the latter:

  • Start-up RStudio (click on icon)
  • Notice message warning about Untrusted application launcher
  • Click Mark Executable
  • RStudio will start up.

Graham @ Microsoft

The fully open source software stack of the Ubuntu Data Science Virtual Machine (DSVM) hosted on Azure is a great place to support an R workshop or laboratory session or R training. I record  here the simple steps to set up a Linux Data Science Virtual Machine (in the main so I can remember how to do it each time).  Workshop attendees will have their own laptop computers and can certainly install R themselves but with the Ubuntu Data Science Virtual Machine we have a shared and uniformly configured platform which avoids the traditional idiosyncrasies and frustrations that plague a large class installing software on multiple platforms themselves. Instead of speding the first trouble filled hour of a class setting up everyone’s computer we can use a local browser to access either Jupyter Notebooks or RStudio Server running on the DSVM.

Jupyter Notebooks on JupyterHub

We illustrate the session with both Jupyter Notebook supporting multiple users under JupyterHub and as a backup running RStudio Server (for those environments where a secure connection through https is not permitted). Both can be accessed via browsers. JupyterHub uses https (encrypted) which may be blocked by firewalls within organisations. In that case an RStudio Server over http is presented as a backup.

WARNING: Jupyter Notebook has been able to render my laptop computer (under both Linux and Windows, Firefox and IE) unusable after a period of extensive usage when the browser freezes and the machine becomes completely unresponsive.

Jupyter Notebook provides a browser interface with basic literate programming capability. I’ve been a fan of literate programming since my early days as a programmer in the 1980’s when I first came across the concept from Donald Knuth. I now encourage literate data science and it is a delight to see others engaged is urging this approach to data science. Jupyter Notebooks are great for self paced learning intermixing a narrative with actual R code. The R code can be executed in place with results displayed in place as the student works through the material. Jupyter Notebooks are not such a great development environment though. Other environments excel there.

JupyterHub supports multiple users on the one platform, each with their own R/Jupyter process. The Linux Data Science Virtual Machine running on Azure provides these open source environments out of the box.  Access to JupyterHub is through port 8000.

Getting Started – Create a Ubuntu Data Science Virtual Machine

To begin we need to deploy a Ubuntu Data Science Virtual Machine. See the first two steps on my blog post. A DS14 server (or D14_V2 for a SSD based server) having 16 cores and 112 GB of RAM seems a good size (about $40 per day).

We may want to add a disk for user home folders as they can sometimes get quite large during training. To do so follow the Azure instructions:

  1. In the Portal click in the virtual machine.
  2. Click on Disks and Attach New.
  3. Choose the Size. 1000GB is probably okay for a class of 100.
  4. Click OK (takes about 2 minutes).
  5. Now log in to the server through ssh:
    ssh xyz@dsvmxyz01.southeastasia.cloudapp.azure.com
  6. The disk is visible as /dev/sdd
    • $ dmesg | grep SCSI
  7. Format the disk
    • $ sudo fdisk /dev/sdd
    • Type
      • n (new partition)
      • p (primary)
      • <enter> (1)
      • <enter> (2048)
      • <enter> (last sector)
      • p (create partition)
      • w (write partition)
    • $ sudo mkfs -t ext4 /dev/sdd1
  8. Create a temporary mount point and mount
    • $ sudo mkdir /mnt/tmp
    • $ sudo mount /dev/sdd1 /mnt/tmp
    • $ mount | grep /sdd1
  9. We will use this disk to mount as /home by default, so set that up
    • Check how much disk is used for /home
      • $ sudo du -sh /home
    • Synchronise /home to the new disk
      • $ sudo rsync -avzh /home/ /mnt/tmp/
    • Identify the unique identifier for the disk
      • $ sudo -i blkid | grep sdd1
    • Tell the system to mount the new disk as /home
      • $ sudo emacs /etc/fstab
      • Add the following single line with the appropriate UUID
        UUID=f395b783-31da-4916-a3a9-8fb56fd7a068 /home ext4 defaults,nofail,discard 1 2
    • Now mount the new disk as /home
      • $ sudo mount /home
    • No longer need the temporary mount so unmount
      • $ sudo umount /mnt/tmp
    • Move to the new version of home and ensure ssh can access
      • $ cd ~
      • $ df -h .
      • $ sudo restorecon -r /home

Connecting to JupyterHub

If you set up a DNS name label dsvmxyz01 and the location is southeastasia then visit:

https://dsvmxyz01.southeastasia.cloudapp.azure.com:8000/

First time you connect to the site you will be presented with a warning from the browser that the connection is insecure. It is using a self signed certificate to assure the encryption between your browser and the server. That is fine though a little disconcerting. As the user you could simply click through to allow the connection and add an exception. This often involves clicking on Advanced and then Add Exception… and then Confirm Security Exception. It is safe to provide an exception for now. However, best to install a proper certificate!

Install a LetsEncrypt Certificate

We can instead install a free Let’s Encrypt certificate from letsencrypt to have a valid non-self-signed certificate. To do so we first need to allow connection through the https: port (443) through the Azure portal for the dsvm. Then log on to the server and do the following:

** TO BE UPDATED TO THE EQUIVALENT IN UBUNTU **
$ ssh xyz@dsvmxyz01.southeastasia.cloudapp.azure.com
$ sudo yum install epel-release
$ sudo yum install httpd mod_ssl python-certbot-apache
$ sudo emacs /etc/httpd/conf.d/ssl.conf
  Within the Virtual Host entry add
    ServerName xyz.southeastasia.cloudapp.azure.com
    # SSLProtocol all -SSLv2
    # SSLCipherSuite HIGH:MEDIUM:!aNULL:!MD5:!SEED:!IDEA
$ sudo systemctl restart httpd
$ sudo systemctl status httpd
$ sudo certbot --apache -d xyz@dsvmxyz01.southeastasia.cloudapp.azure.com
$ sudo systemctl start httpd

You should be able to connect now without the certificate warning.

You are presented with a Jupyter Hub Sign in page.

Screenshot from 2016-07-29 09:14:41

Creating User Accounts

Log in to the server. This will depend on whether you set up a ssh-key or a username and password. We assume the latter for this post. On a terminal (or using Putty on Windows), connect as:

$ ssh xyz@dsvmxyz01.southeastasia.cloudapp.azure.com

You will be prompted for a password.

We can then create user accounts for each user in our workshop. The user accounts are created on the Linux DSVM. Here we create 40 user accounts and record their random usernames and passwords into the file usersinfo.csv on the server:

for i in {1..40}; do 
  u=`openssl rand -hex 2`
  sudo adduser user$u --gecos "" --disabled-password
  p=`openssl rand -hex 5`
  echo "user$u:$p" | sudo chpasswd
  echo user$u:$p >> 'usersinfo.csv'
done

If the process has issues and you need to start the account creation again then delete the users:

for i in $(cut -d ":" -f1 usersinfo.csv); do 
  sudo deluser --remove-home $i; 
done

# Check it has been done

tail /etc/passwd
ls /home/

Provide a username/passwd to each participant of the workshop, one line only to each user. The file will begin something like:

userce81:d0dfac5a30
userd2ec:a4f142c342
user6309:0f13aeb27a
user0774:e334399343

Now go back to https://dsvmxyz01.southeastasia.cloudapp.azure.com:8000/ and Sign in with the Username userce81 and Password d0dfac5a30 (using the username and password from your own usersinfo.csv file.)

Once logged in Jupyter will display a file browser.

screenshot-from-2016-10-04-200651

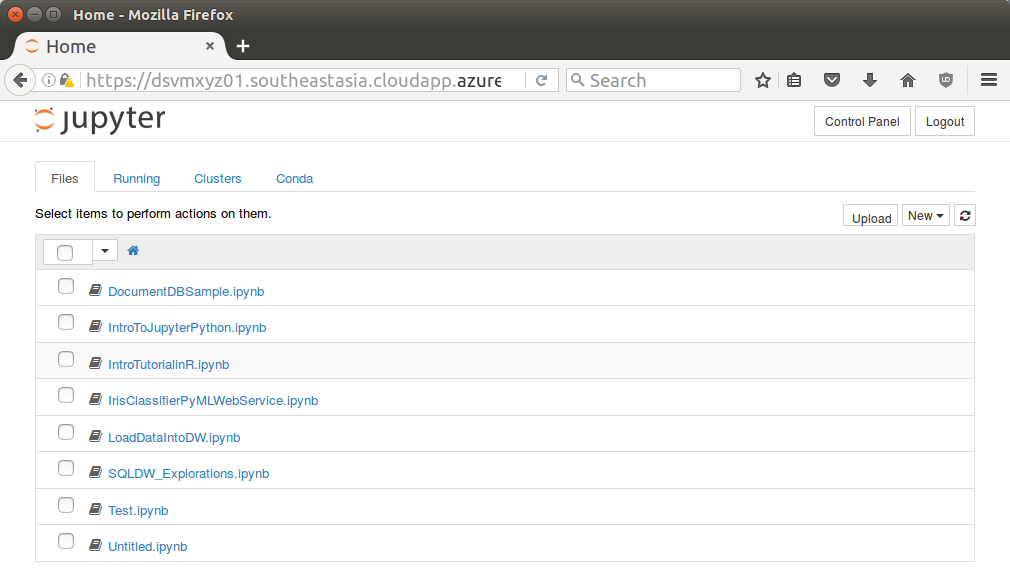
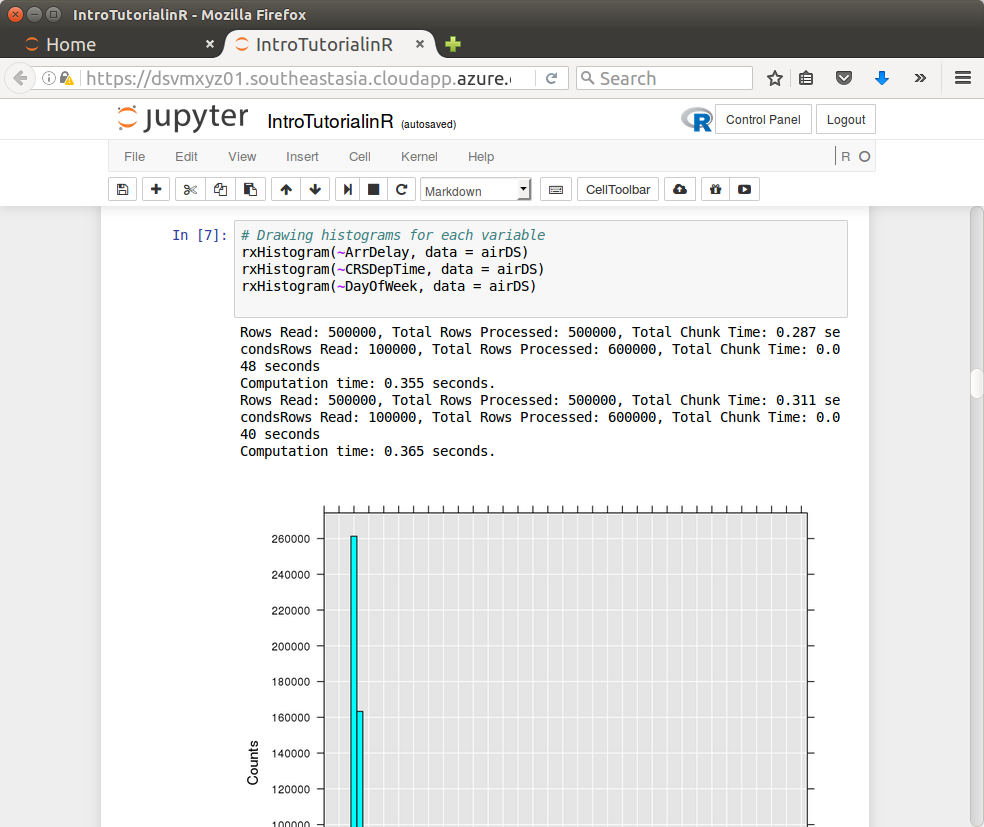
Notice a number of notebooks are available. Click the IntroTurorialInR.ipynb for a basic introduction to R.

Screenshot from 2016-07-29 09:15:49

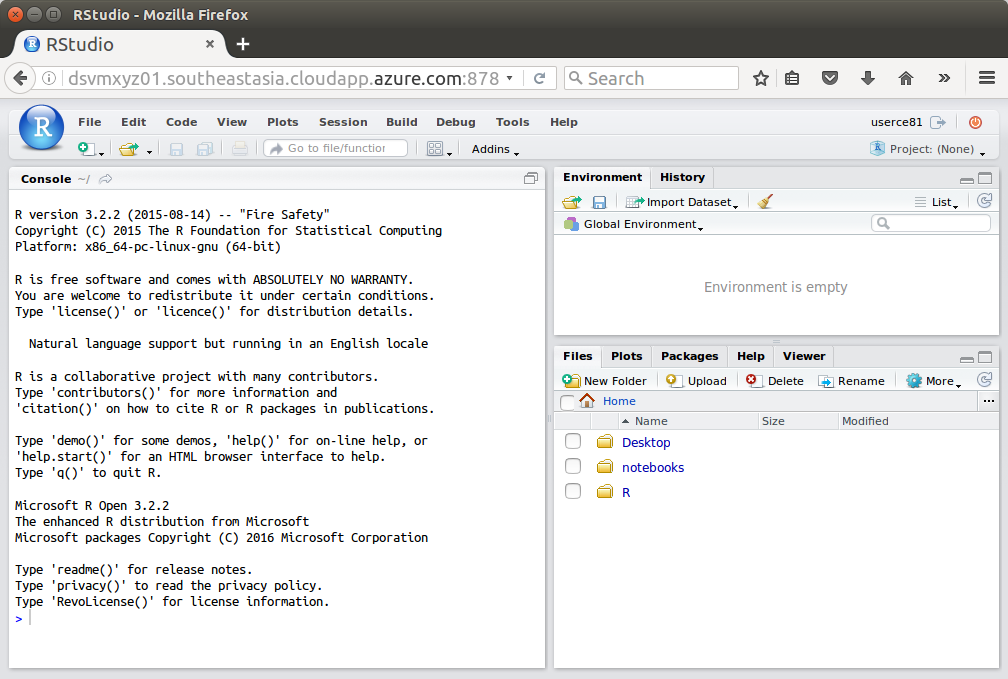
Backup Option – RStudio

JupyterHub requires https and so won’t run internally within a customer site if they have a firewall blocking all SSL (encrypted) communications. In this case RStudio server is a backup option. It is pre-installed on the server and if you followed my instructions above for deploying a DSVM you will hav updated to the latest version too.

Connect to the RStudio server:

http://dsvmxyz01.southeastasia.cloudapp.azure.com:8787

Sign in to RStudio with the same Username and Password as above.

screenshot-from-2016-10-04-203025

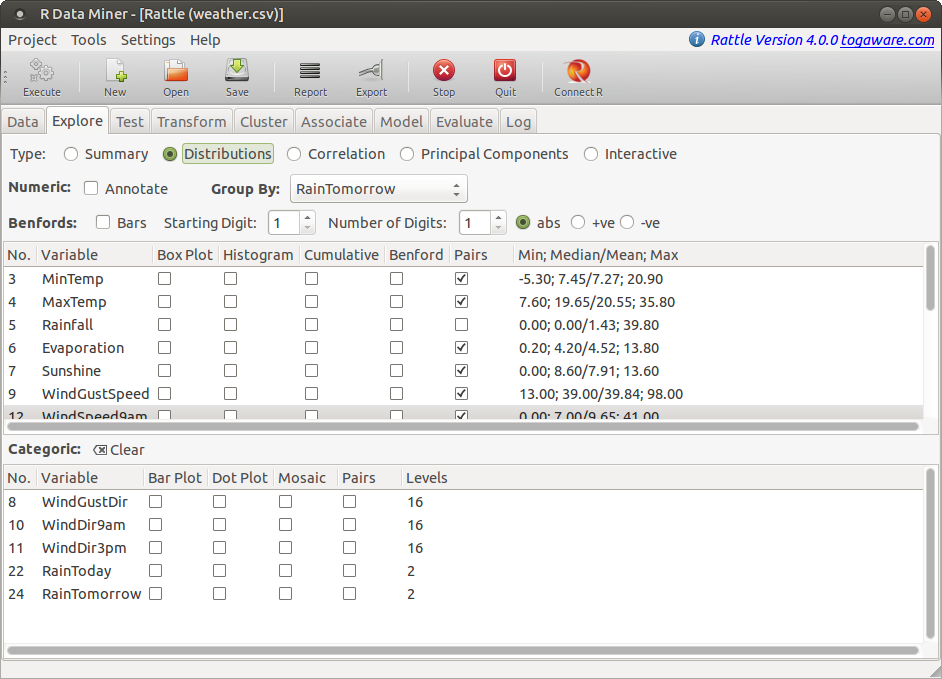
Running Rattle through an X2Go Desktop

If you followed my DSVM deployment guide then you will have also set up X2Go on your local computer to support a desktop connection across to the DSVM. This is very convenient in terms of running desktop apparitions, like Rattle,  on the DSVM. Every student in the class gets the same environment.

Shortcuts to the Services

The URLs are rather long and so we can set up either bit.ly or aka.ms shortcuts. Visiting the latter we set up two short URLs:

https://aka.ms/xyz_hub as https://dsvmxyz01.southeastasia.cloudapp.azure.com:8000
http://aka.ms/xyz_rstudio as http://dsvmxyz01.southeastasia.cloudapp.azure.com:878

We can now use the short URLs to refer to the long URLs.

REMEMBER: Deploy-Compute-Destroy for a cost effective hardware platform for Data Science. Deallocate (Stop) your server when it is not required.

Graham @ Microsoft

I had the privilege to join a panel in 2014 that explored big data opportunities and challenges. Together, coordinated by Professor Zhi-Hua Zhou, we captured our thoughts into a paper published in the IEEE Computational Intelligence Magazine (Volume 9, Number 4).

It is an honour to learn that we have received a 2017 IEEE Outstanding Paper Award. The paper is:

Zhi-Hua Zhou, Nitesh V. Chawla, Yaochu Jin, Graham J. Williams. “Big data opportunities and challenges: Discussions from data analytics perspectives”, IEEE Computational Intelligence Magazine, vol. 9, no. 4, 2014 November, pp.62-74.

The paper includes a discussion of turning ensemble concepts into the extreme, reflecting on the need for the pendulum to swing back toward protecting privacy, and the resulting focus on massively ensembled models, each “model” modelling an individual across extensive populations. The award was bestowed in November 2017.

Data Scientists have access to a grammar for preparing data (Hadley Wickham’s tidyr package in R), a grammar for data wrangling (dplyr), and a grammar for graphics (ggplot2).

At an R event hosted by CSIRO in Canberra in 2011 Hadley  noted that we are missing a grammar for machine learning. At the time I doodled some ideas but never developed. I repeat those doodles here. The idea’s are really just that – ideas as a starting point. Experimental code is implemented in the graml package for R which is refining the concepts first explored in the experimental containers package.

A grammar of machine learning can follow the ggplot2 concept of building layer upon layer to define the final model that we build. I like this concept rather than the concept of a data flow for model building. With a data flow a dataset is piped (in R using magrittr’s %>% operator) from one data wrangling step to the next data wrangling step. Hadley’s tidyr and dplyr do this really well.

The concept of a grammar of machine learning begins with recognising that we want to train a model:

train(ds, form(target ~ .))

Simply we want to train a model using some dataset ds where one of the columns of the dataset is named target and we expect to model this variable based on the other variables within the dataset (signified by the ~ .).

Generally in machine learning and statistical model building we split our dataset into a training dataset, a validation dataset, and a testing dataset. Some use only two datasets. Let’s add this in as the next “layer” for our model build.

train(ds, form(target ~ .)) +
  dataPartition(0.7, 0.3)

That is, we ask for 70% of the data randomly sampled to train the model.

We will have already performed our data preparation steps and let’s say that we know in ds the target variable has only two distinct values, yes and no. Thus a binary classification model is called for.

In R we have a tremendous variety of model building algorithms that support binary classification. My favourite has been randomForest so let’s add in our request to train a model using randomForest().

train(ds, formula(target ~ .)) +
  dataPartition(0.7, 0.3) +
  model(randomForest)

Now we might want to do a parameter sweep over the mtry parameter to the randomForest() function which is the number of variables to randomly sample as we build each decision tree.

train(ds, formula(target ~ .)) +
  dataPartition(0.7, 0.3) +
  model(randomForest) +
  tuneSweep(mtry=seq(5, nvars, 1))

Finally to report on the evaluation of the model using the area under the curve (AUC).

train(ds, formula(target ~ .)) +
  dataPartition(0.7, 0.3) +
  model(randomForest) +
  tuneSweep(mtry=seq(5, nvars, 1)) +
  evaluate_auc()

The object returned is a trained model incorporating the additional information requested. Other operations can be performed on this model object, including its deployment into a production system!

We can provide parameters as a lightweight layer above other model building packages with no or minimal effort required to move to a new model builder.

  model(randomForest::randomForest, 
        ntree=100, 
        mtry=4, 
        importance=TRUE,
        replace=FALSE, 
        na.action=randomForest::na.roughfix)

(Image from http://grammar.ccc.commnet.edu/grammar/)

Graham @ Microsoft

A 5-video series called Data Science for Beginners has been released by Microsoft. It introduces practical data science concepts to a non-technical audience… making data science accessible – keeping the language clear and simple as an entry point to understanding data science.


http://aka.ms/data-science-for-beginners-1
http://aka.ms/data-science-for-beginners-2
http://aka.ms/data-science-for-beginners-3
http://aka.ms/data-science-for-beginners-4
http://aka.ms/data-science-for-beginners-5

Graham @ Microsoft